Garage Changes
So while I was not spending time on the car over the last two years I did put some time into the garage...
The company i work for moved to a new building that was previously owned by an oil company. They left tons of heavy duty filing cabinets behind, I work for a tech company, we dont have much use for paper... so i was told i could take some home... cant argue with the free price tag. I have hundreds of pounds of tools in the drawers and they still roll smooth. I then took boardroom tables (also free) and cut them down the middle to create the counter tops. Each filing cabinet is bolted to the wall and to the cabinet next to it. There is also a slab of marble at the bottom of each filing cabinet. This all makes for a very solid bench that is at the perfect height for me.
If you look close you can see all the magnetic labels, these were made by taking magnetic white boards (left behind by the oil company again) and sticking label maker labels to them then cutting them out. Now i can find any tool fast. I then mounted an all in one computer to the wall for bringing up the GTM manuals and searching the internet for wisdom.
To mount tools on the wall i found a company that was going out of business that had painted slatwall in their space that they had to remove at the end of their lease. I did the work removing the slat wall for free and used the best sheets in my garage. I found that slatwall hooks are easy to find at most hardware stores and many specialty hooks can be found online for things like drills or paper towel, etc.
I built some shelves at the end of both sides to house my larger tools and a mini-fridge for some beverages. I'm not sure if you can see them very well but i also added some hanging retractable systems from the roof that include an air hose, 2 power cords and a trouble light.
I added an Amazon Echo, and wired her into the roof speakers for some tunes and quick unit conversions.
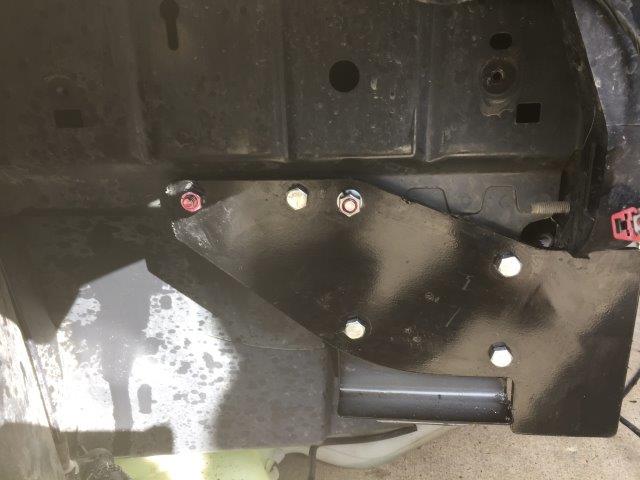
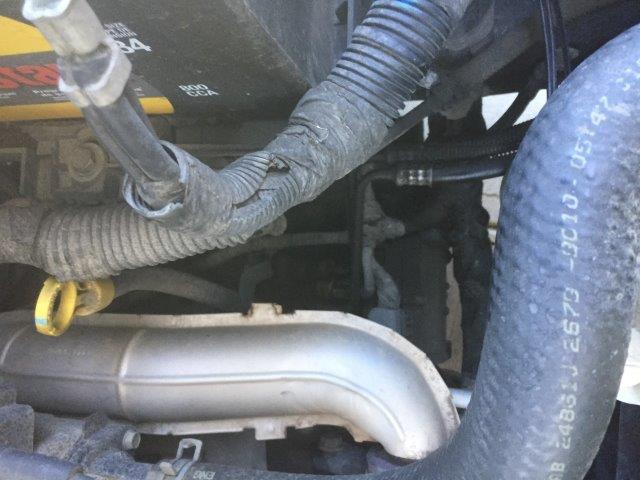
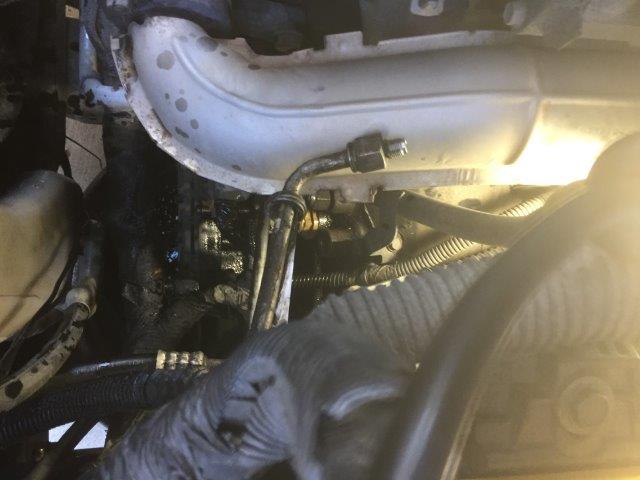
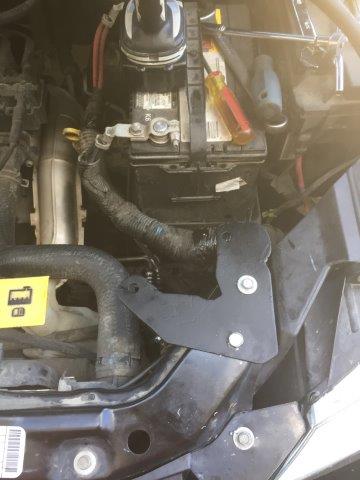
Some car photos taken today... Kooks Exhaust
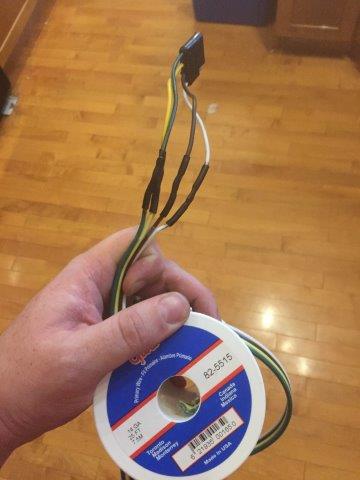
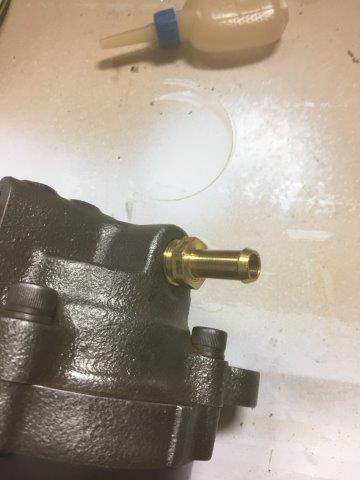
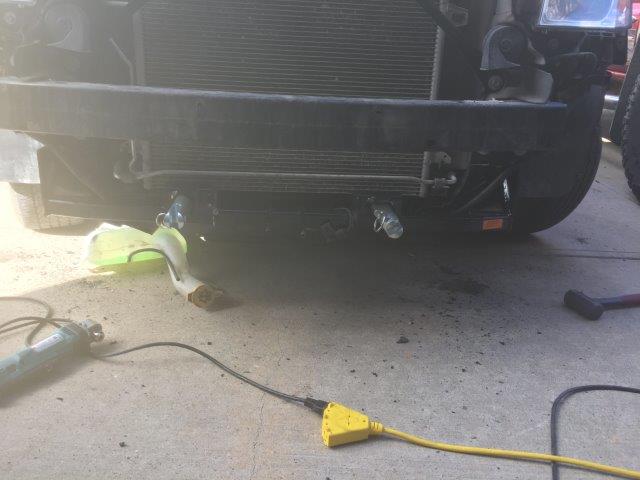
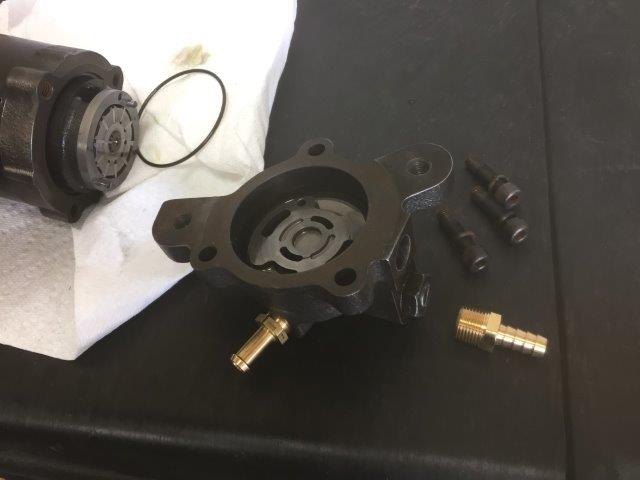
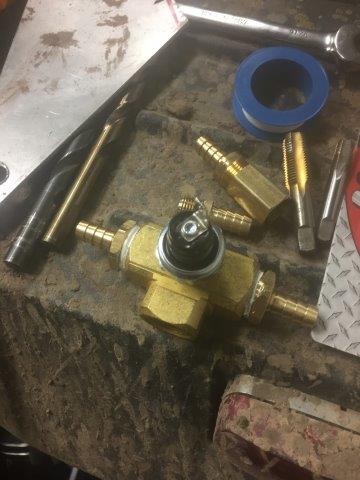
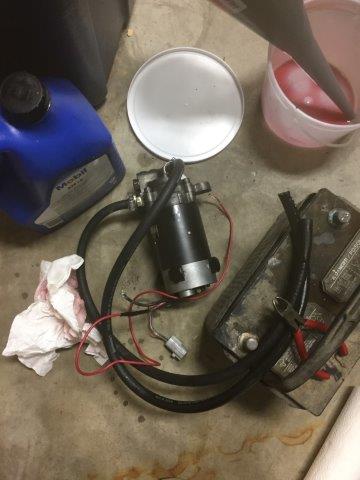
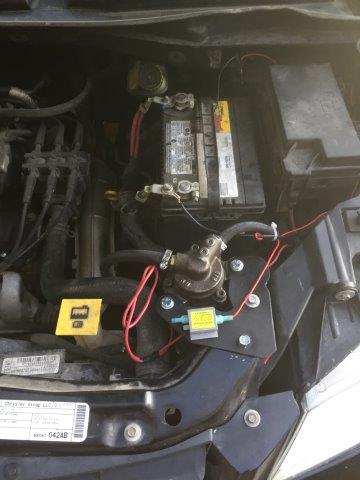
Fuel pump mounting, the wiring is temporary until my fuel pump controller comes in
Today was seat day... this proved to be more challenging to do alone then i though so i had a friend come over to mark bracket positions while i sat in the seat while working the peddles. I am a little over 6 foot 2 and found that no matter how tried to position the sliders they took up to much valuable seat height. On top of that my legs require the seat to be as back as far as possible anyway... so i ditched the sliders and used the brackets i bought (i think i got them from Shane) without the sliders. now the seats sit perfect all the time. I don't plan on letting anyone drive my car anyway 🙂
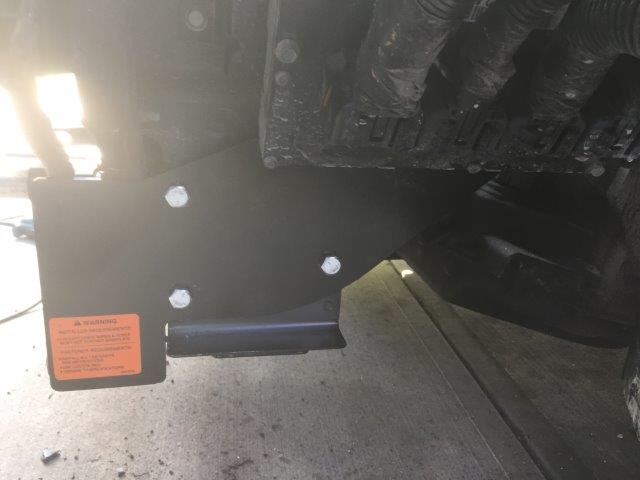
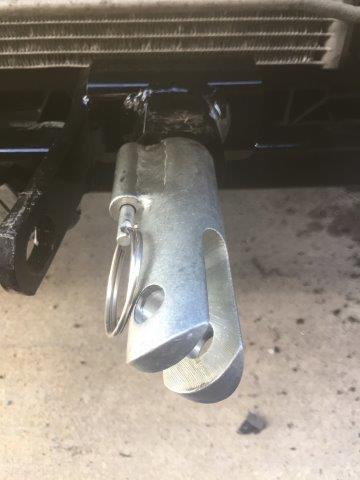
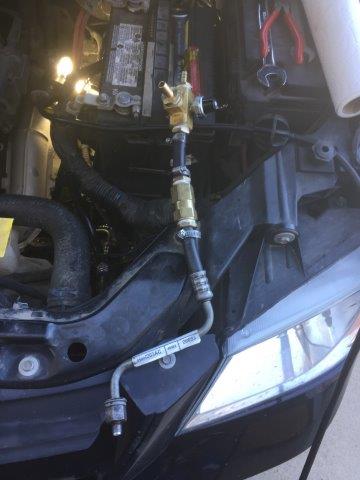
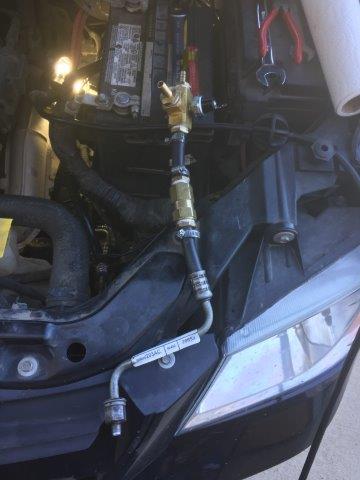
You cant see it in this photo but we also got the AC Accumulator bracket bent, painted and installed.
Last month i finally got around to buying my own welder, its a small gas MIG, should be good enough for what i need to do.
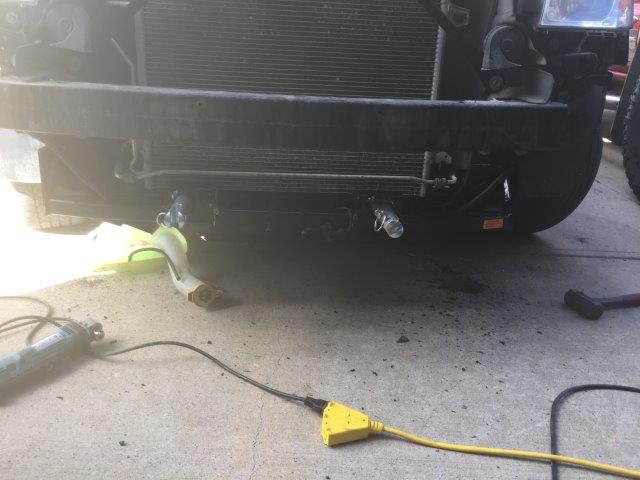
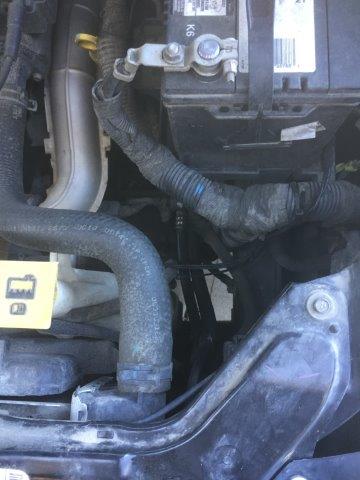
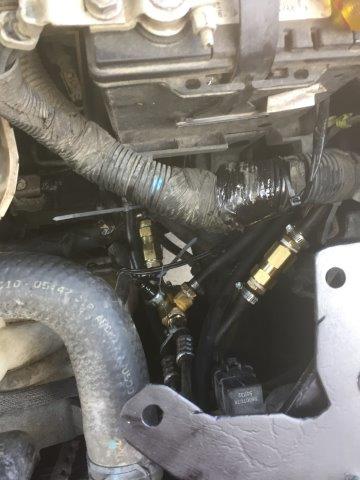
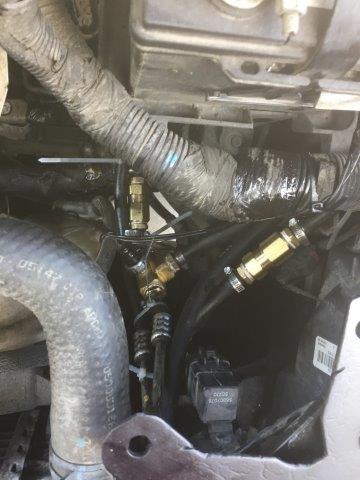
So I had some time today to run the engine long enough for the coolant to start pumping, everything seems to cool just fine. Engine maxed out at about 210 degrees while idling, the fans never kicked on but i think that's because it didn't get hot enough. I also routed the shift cables further away from the exhaust, melting those wouldn't be good.
I have to say, i have never actually seen a finished GTM, never heard one run until yesterday... The LS1 with the Kooks exhaust sounds amazing, youtube videos do not do the noise justice.
Back to the GTM
The GTM has been sitting in my garage untouched for 2 years now... I would like to say life got in the way, which is true to some extent but i think it was mostly a lack of motivation. The last thing i tried to do was run the starter and was greeted with a horrible metal on metal noise from inside the engine.... around that time i also switched jobs, so it sat... and i moved on to some of my other unfinished projects.
Fast forward to this week (I started Monday morning)
- I got some time off work
- Figured out the engine noise (My uncle was over, he's a car guy, he asked to hear the noise, i cranked it over... 5 seconds pass as he thinks, he points to the trans adapter and says "loosen those bolts"..... sure enough, noise goes away. The bolts on the trans adapter were contacting the flywheel.... didn't think it would be that easy. )
- I yanked off the GTM exhaust and put on the Kooks that has been sitting in its box for 2 years
- Now the air filter wouldn't fit because it hit the exhaust, i ordered the cold air intake kit from FF but its still in the box.. i found the box and just used the rubber piece with slight slope on it to raise the air filter up. This will work for now.
- Reinstalled the starter (it misses the kooks by about 2mm)
- Moved the fuel pump behind the drivers head, my old location made filter changes almost impossible. I am running the Aeromotive A1000 pump and its not small.
- Wired up the fuel pump (temporary relay setup for now, it will need a fuel pump controller)
- Installed the Aeromotive fuel rails, pressure gauge, and all AN fittings with braided lines (bought all this 2 years ago as well)
- Dug though boxes for hours to find the fan plugs i bought years ago and wired up the fans. (
- Checked all the fluid levels
- Wednesday morning, gathered the family, turned the key and crossed my fingers.
No hesitation, started right up, ran smooth. That's the first time that engine has run since it came out of the Vett 3 years ago. Had i known it would take me less then 2 days of work to get it running i think i would have done it years ago.
So, it looks like i am motivated again 🙂 Next step is to get it go-karting this week..
Before Karting, i need to:
- Finish the AC lines and charge them. (was just going to use a cheap Walmart charge kit for now)
- Mount the AC accumulator (right now its kind of floating)
- Mount the seats, I bought the tabs and rails, i just have to mount them
- Make a wiring harness for the gauge cluster wires (temp, oil pressure, tach, speed, also running a Tach wire to the fuel pump controller)
- secure the ebrake cable assembly, right now they could get caught in the axles
- Create a home for and secure the engine relays (fuel pump, etc)
- Check all bolts...
- Tear up the neighborhood 🙂
I have also had a few problems i have not been able to find solutions to yet...
- I bought aluminum tanks, they have a vent line.... the garage now smells like gas. What is the best way to prevent the smell. Is there a smaller charcoal canister that is easier to hide then the factory unit? or do people just generally get a roll over valve and call it a day.
- I have a check engine light and a code for EVAP. Makes sense as i have completely remove the factory evap system. How do i get rid of the code so i can trust the check engine light, should i find someone to reprogram the ECU or is there a way to trick the wiring into thinking its there?
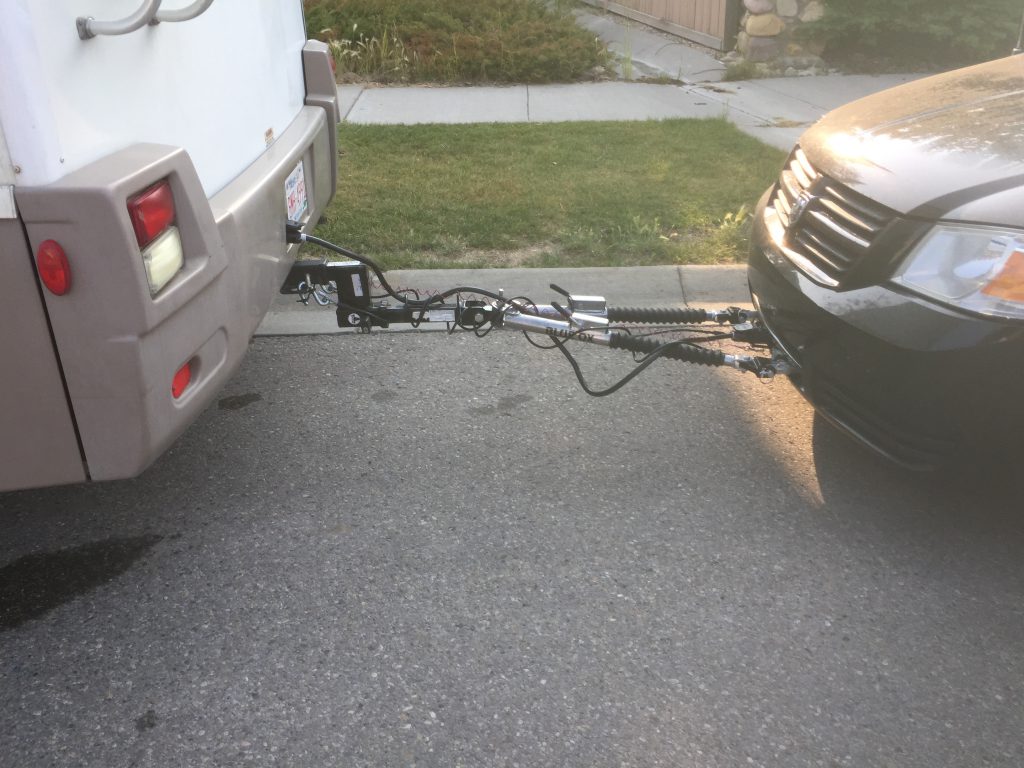
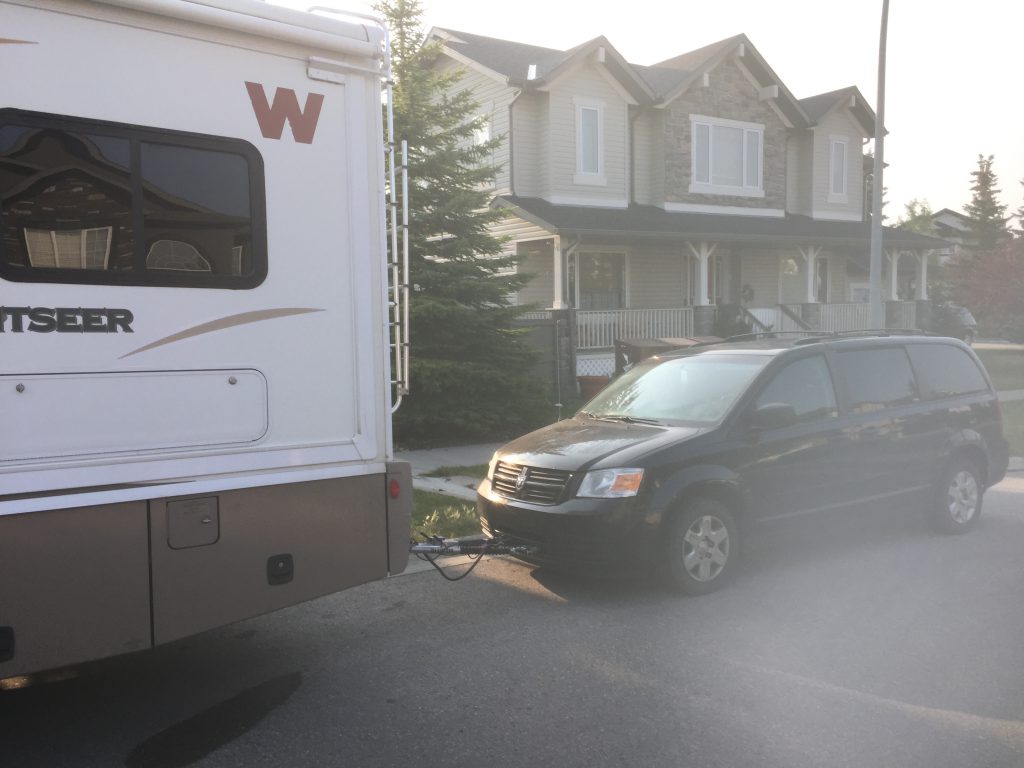
Mini Van Toad
I have a 2010 Dodge Caravans as our family vehicle, I want to tow this behind our RV when we go on trips.
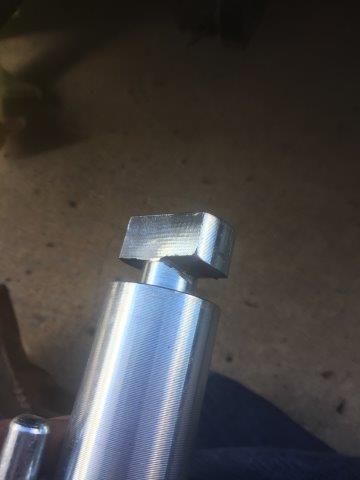
I was able to pick up a BlueOx tow bar, mounts and Brake Buddy all used over the last few months but the one piece i cant seem to find used is the lube pump system that circulates lubricant though the transmission while the van is being towed.
I took a look at the Remco system and it seems overly priced for what it is. I can handle just about anything mechanical and have gone so far as to build a car from scratch in the past so these things don't really scare me.
So here's my idea.
- Tap the oil pan with a standard fitting like this.
- Attach a standard lube pump like this
- Potentially add two solenoids and a Y fitting for the return line.
now the Remco pump has an alarm in the cab, this will easily be accomplished by adding a simple oil pressure sensor like this. It is possible to buy static pressure sensors that short the terminals together when a specific pressure is met. Simply wire this into the 7 way plug and up to a light and buzzer on the dash.
I bought:
- 3 way tap https://www.amazon.ca/gp/product/B00...?ie=UTF8&psc=1
- 2 of these packs of 5 fittings https://www.amazon.ca/gp/product/B00...?ie=UTF8&psc=1
- this oil pressure switch https://www.amazon.ca/gp/product/B00...?ie=UTF8&psc=1
- 10 or so 3/8 hose clamps
- 10 or so feet of 3.8 hose
- this buzzer https://www.amazon.ca/gp/product/B00...?ie=UTF8&psc=1
- This dash light https://www.amazon.ca/gp/product/B01...?ie=UTF8&psc=1
- this remote cooler (way to big in hindsight but that only helps) https://www.aliexpress.com/item/EPMA...708.0.0.v1MJeo
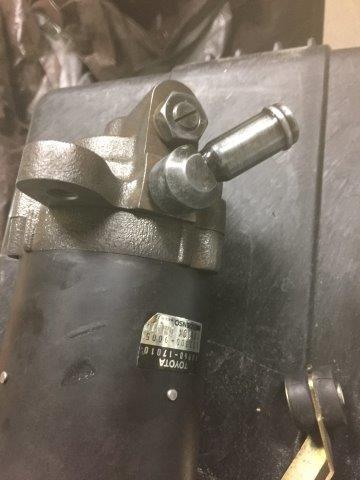
- A Toyota MR2 power steering pump (used from a guy parting out his car online.
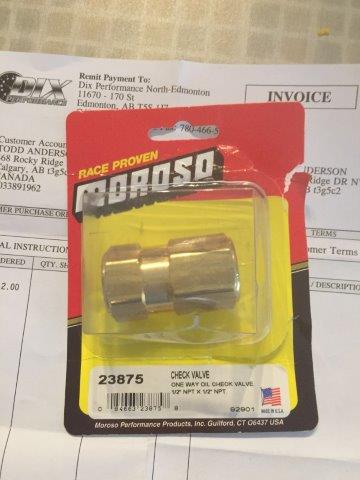
- two one way valves, i found these after, i bought more expensive ones https://www.amazon.ca/Non-Return-Pet...+way+oil+valve
- A fitting for the pump high pressure side, not sure what size, i got them for free from the bins at my local autoparts store, they never charge for anything from the bins.
- this charger https://www.amazon.com/gp/product/B0...?ie=UTF8&psc=1
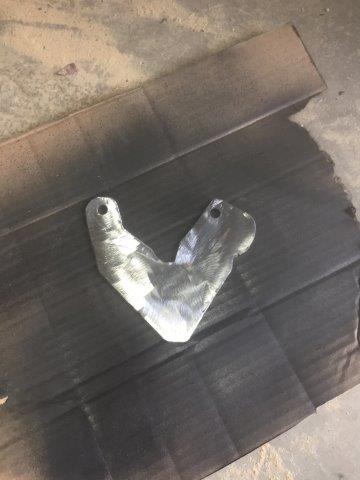
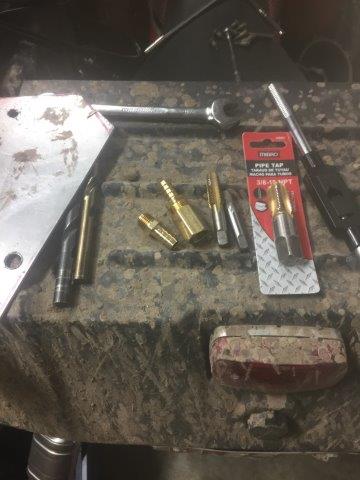
I also had to buy a tap and die to put the pressure sensor into the 3 way fitting and I had to use a chunk of steel i had lying around to make a bracket.
Creation of the cable that goes between the RV and the car. At first i made it the full length of the wire i bought knowing i would have to make it smaller when i knew the proper length. All of these parts came from princess auto.
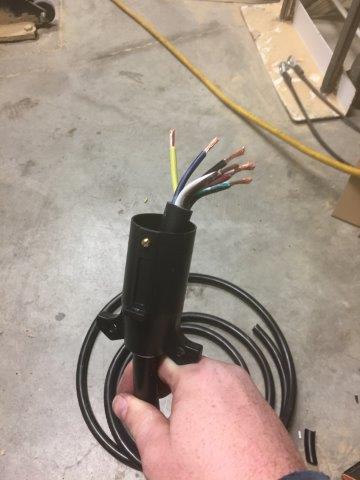
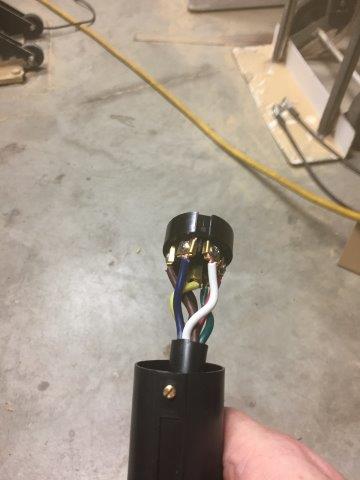
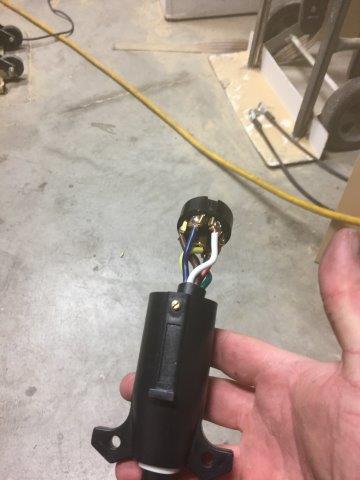
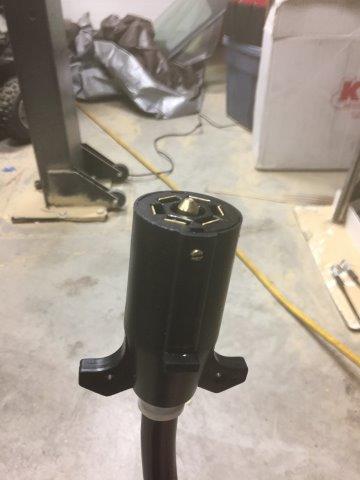
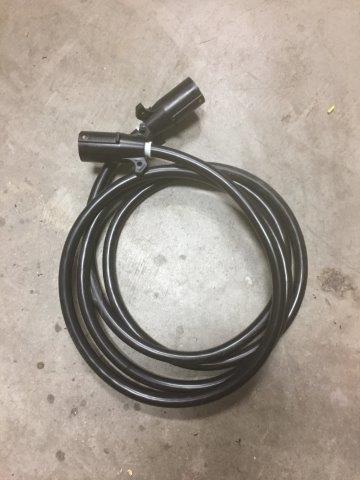
This is the 7 way plug that mounts on the van. Its from princess auto, the light portion of the plug goes to a 4 way plug after about 6" of wire.
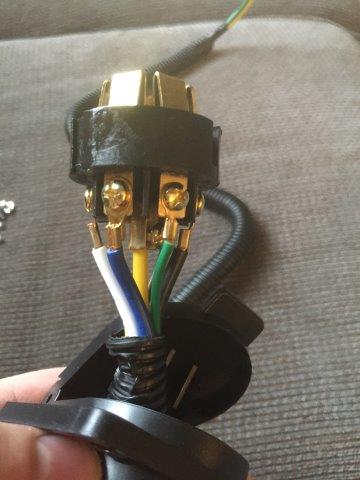
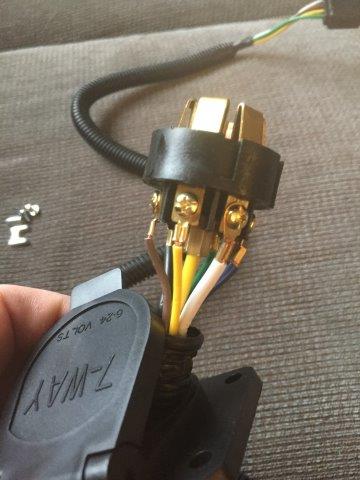
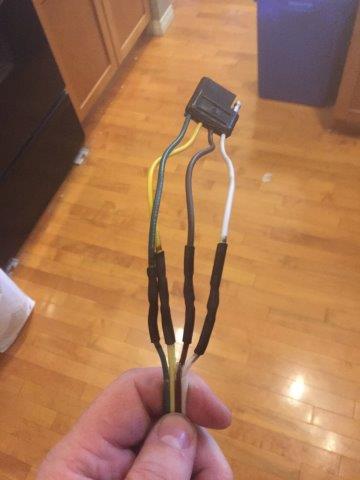
This is the 4 way plug that i connect to the back of the 7 way plug to run the lights. The spool of wire snakes under the car to the tail lights
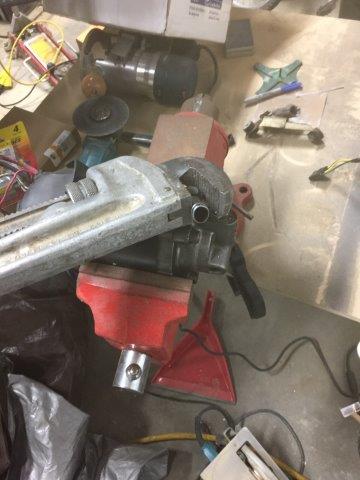
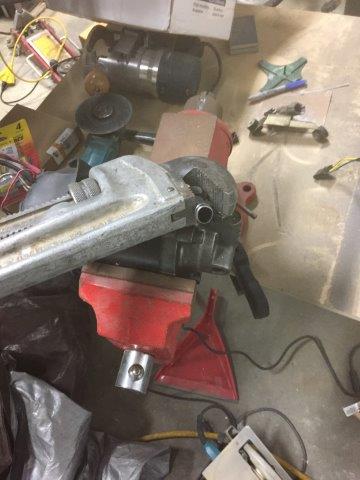
This is the fitting that comes on the pump. I assumed it was threaded and would come off so i put a wrench on it.. DONT DO THIS, it was a big mistake. The fitting is pressure fit in, once it comes off there is nothing threaded that you can use.... So i had to take the pump apart, drill a larger hole, tap and thread it with an NPT thread then put in a new fitting. It would have been easier to get an adapter that adapted the larger hose from the fitting to a smaller 3/8 hose... lesson learned 🙂
This is a 3/8 NPT fitting that i got for free that fits the pump perfectly. I sealed it with Teflon tape on the threads.
I bought two of these one way valves from amazon. In hindsight i would have bought the cheaper versions that i linked to in yesterdays thread.
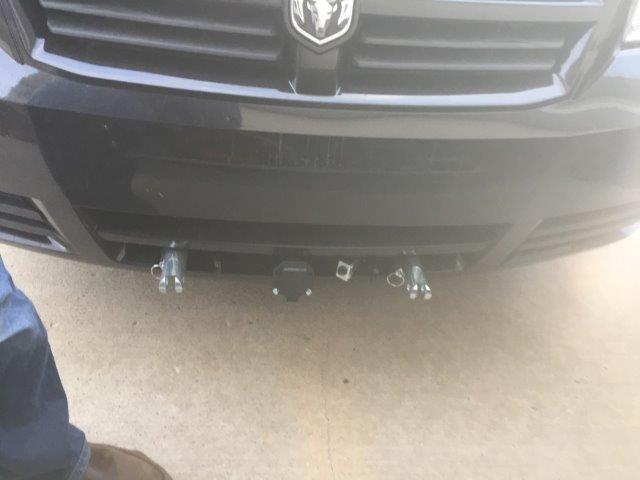
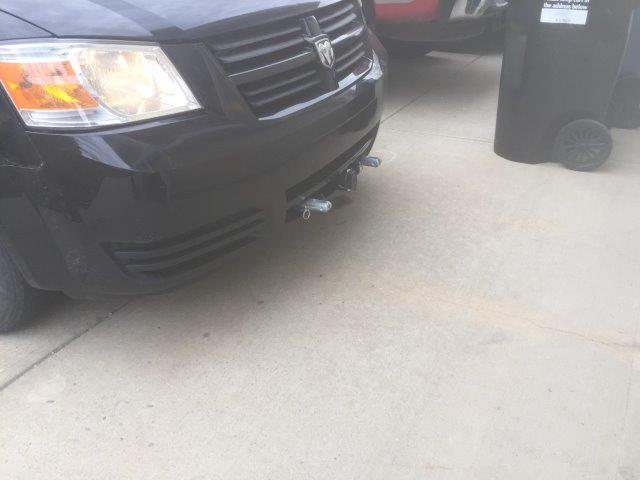
Bolting on the towbar, all of these holes had to be drilled.... This is very hard to do, the steal you are drilling into is the vans structural support, its quite hard and thick. All of these bolts are put on with lock tite red.... they will never come off.
These fit into the tow bar, but mine wouldn't fit on the driver side, i had to file off a very small amount of the top of the T to get it to fit and turn smoothly. I bet a piece of the interior weld is left in the tow bar side.
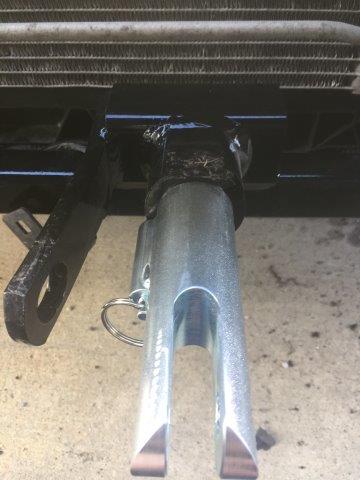
Tow bar installed and bumper trimmed.
I made a simple mount for the pump.
I needed a way to monitor the function of the pump from the RV cab. I drilled a hole and tapped with a 1/8" NPT. This is where the pressure sensor will later mount.
Taps and tools i used
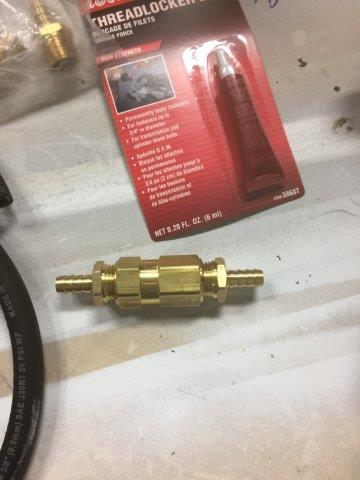
The assembled one way valves. Fittings and valves came from amazon

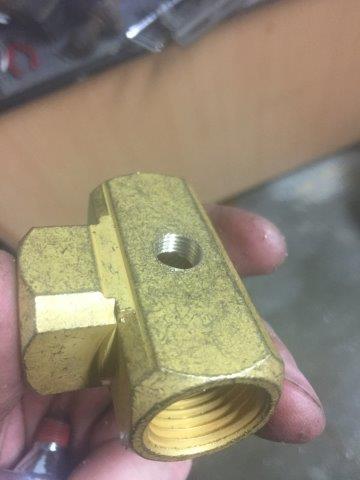
This is the 3 way setup with the installed pressure sensor, this sensor was later replaced with one that has a ground lead.
A dry run test of the pump to see how much it would pump at idle
if you look down at the transmission through this hole you can see two lines, the one on the driver side is the line you need to tap as its the output line. I cut about 3" from the transmission side. followed by the first one way valve, followed by another 2" of 3/8 hose, then the 3 way, then into the factory oil cooler. The other side of the 3 way heads to the new cooler then to the pump, from the pump it then heads to the oil pan pickup (in reality the fluid starts at the pan and works its way to the 3 way valve)
This is what the pump looks like with two fittings.

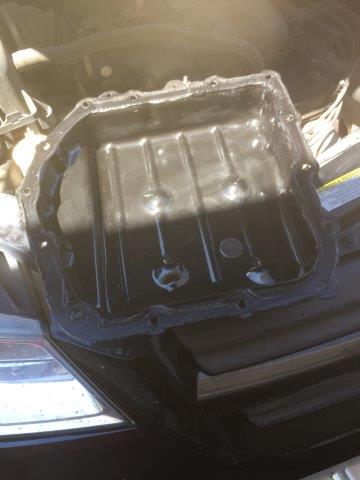
Removed the oil pan from the transmission, I bought a new filter and seal because now is a good time to change them. I will try and get a picture of where i put the fitting. Its on the passenger side, toward the rear of the pan as low down as i could get. I tapped the pan with a 3/8 npt tap and then put JBweld on the fitting threads before screwing it in. i then covered the inside and outside in JBWeld so the fitting will NEVER move again.
Final pump installed and living in its new home.
Bought a battery charger box from amazon that will slowly charge the battery, wired that into the trailer plug on the van, included another diode so the pump can pull power off the RV but not off the van. (30 minutes)
There is a factory cooler on my van, disconnected it and ran the engine for 5 seconds to see which side pumps out fluid, put the first one way valve on that followed by the 3 way with the pressure sensor. The new side of the 3 way goes to the 2nd one way valve then off to the cooler and then the pump. The other side of the pump goes to the transmission pan, you will need to take off the pan and tap it low so it picks up oil.
Now we need an alarm to know if things fail. I wired the spare pin on the 7 way plug on the van to the pressure sensor I installed into the 3 way. I then picked that wire up on the RV side and ran it back to the drivers area and wired it into the buzzer and light. So if the pressure sensor stops detecting pressure the buzzer goes off and the light goes on. I also wired that into a switch so i can turn the alarm off when i am not towing the van. Thats where I sit today. Next weekend i will tow it out for its first camping trip, I leave for a 10,000K trip that will last a little over a month in about 20 days..... so that will be the true test
So all in it was around $1500 CAD... or about $1130 USD... My amazon prime account covered almost all of the shipping charges.
I was a little worried that the pressure might be a little bit to high so i added a pressure gauge. The pressure that the Van creates on its own is within 2 PSI of the MR3 Power steering pump that i used (at idle)
Fountain Pop
As a child I remember going into my uncles basement.... wait let me start that a different way. As a kid my uncle used to have a bar in his basement where we could help ourselves to unlimited fountain pop. The basement was full of cool toys like a pool table, hot tub and just about every other item you could cram into a basement.
Well i guess a little of that stuck with me over the years. I started out with a sodastream machine but always new i wanted to install a full fountain pop machine in the house just like they have in every restaurant.
About 5 years ago i started collecting parts and pieces at auctions and finally ordered the last of the parts a few weeks back from http://www.sodadispenserdepot.com/
If your thinking about doing the same thing in your home here's a few things to consider...
Working out the Home Automation interface.

So over the last few days i have been playing with HTML5 and CSS to work out the best interface options for how automation could function.
So far I am leaning toward a node style interface. Elements could be added with a right click menu that provides inputs, outputs and decision conditions.
I still have a lot of interface work before turning my attention to the back end.
i need to:
- Add a way to remove items. (right now you can only add them.
- I have text boxes but i think it would be good to have drop downs, maybe check boxes or radio buttons but i am not sure about that one.
- Create some Javascript that exports to JSON and sends back to the server on every edit. Should save the last 100 or so edits in a queue so i can add an undo button that works even weeks, months or years after the edit.
- Create a JSON standard for how elements are added, put this in the database so adding new plugins can add new inputs/outputs/conditions.
- The menu lists will be dynamic so i need to have an option for menu items to wrap around if they are more then 15 or so items.
Something not car related.
Its time to get the RV out so i started by charging the batteries.
So i started thinking about how i can get TV shows and movies out to the RV. So i came up with a pretty slick system.
- The RV now has a networked storage device with 6TB of storage (Built out of parts i had kicking around)
- The storage device connects to a router running OpenWRT that automatically bridges to my home network when its in range.
- I have a script running on my home server that launches every hour and looks for the storage device
- If the storage device is found it starts to sync
- All kids movies sync, it will delete any movies that were previously synced that no longer are marked as kids movies.
- All unwatched parents TV shows, it also cleans up and deletes anything that has been watched since the last sync.
- The top 50 unwatched movies.
- The ROMS folders that contain NES/SNES/etc games.
- Thats it.
So the end result:I pull the RV in front of the house (like i do before every trip), I plug in shore power to the house overnight to top up the batteries and test everything. This causes the storage box to automatically boot up and the router to auto connect which allows the movies to auto sync. Now when we start out on our trip we have TB's of new TV and Movies to watch.
Productive Week, I took some time off work.
So i took a week off work to work on the car. From my previous list these items are now complete.
- Check that i mounted down all steering bolts. (torque to spec, with thread lock)
- Find bolts that will fit though the new trans mount. (starter bolts fit perfect)
- Finish front aluminum,
- Rivet radiator down again.
- Attach the heater lines again
- Fill with coolant (24 litres in there so far, once the engine starts i bet it gets to 30ish)
- Mount fuel pump+filters
- Mount fuel rails
- Create metal mounting point for the fuel regulator
- Create a metal floor to mount the fuel pump to on the drivers side)
- Create a metal plate to mount the engine bay fuses to.
- Fill engine with oil.
- Grease all zerks
- Install new plug wires. (i have them in a box.... somewhere)
- Mount Starter, (new bolt is on order)
- Mount ECU, (I already modified the bracket)
- Run wiring harness. (I had to change a few ends but i would highly recommend buying a premade one like i did.)
- Exhaust (just the factory/GTM stuff for now, Kooks ordered)
- Aircond, finish plumbing
These items i missed off my last list are also complete
- Engine Grounded (had to buy a few grounding straps for engine/trans)
- Fix clutch leak at slave
- Fix brake leak at reservoir
- Drained the old oil, replaced the filter
- Replace the broken bolt on the suspension and find a bolt for the cable shift bracket.
- Created block off plates for the air system on the exhaust
- Plugged the EGR tubes on the intake
- Basic alignment (using tape measure, to be fixed by the pros later)
- Install the heater bypass valve (I think this came from crash's site, i bought it a while ago)
These items are still left (but most of these are not stopping me from starting it)
- Mount clutch peddle stop (Visited a few hardware stores and came up with a plan, just have to install it)
- Wire the radiator fan in. (harness is done but i don't have the connectors for the fans, ordered new ones off Ebay, will be here soon)
- Mount the seat (ordered rails from Amazon, not delivered yet)
- Fill AC lines. (R134a doesn't seem to exist in Canada anymore, all the kits i can find are 22a, Walmart seems to sell R134a online, i will try that)
- Install some kind of fusable link between the engine and the starter/alternator (big positive cable beside the exhaust scares me)
- Fill Trans with oil. (Found on Amazon for $40 a litre, its a rip off buy my only choice, i ordered it)
- I lost (or maybe never took off the donor) the MAF sensor.... cant start the car without it. (ordered a new one)
- Find a way to finish the emergency brake. (I will have to order a longer brake cable, its good enough for now.)
- Mount aluminum pieces that go beside the fuel tanks. (have to drill them for the cross over pipe)
- Mount fuel tank (I bought a 4x8 sheet of 3/4 rubber at a local hardware store, I will cut a few 2x4 style strips out of it to build a rubber version of the wooden 2x4 that everyone seems to use)
- Secure down each of the fuel line connectors
- Mount the pillow bearing by the peddle box, the current FFR part isn't large enough to mount the bearing, i will need to weld some new metal on.
I also had my 2 post lift fail which took about 5 hours to fix. The passenger side of the lift stuck fully extended and wouldn't go down, but the drivers side did go down. The car was sitting VERY crooked, I could have dropped the car if I wasn't paying attention. I had to prop up the system with a 2x4 and a floor jack. I then tried to fix the high pressure line fittings that were leaking.... While i did fix the leak the jack would still not descend. I then figured out that i had to much rear weight after the engine and transmission were installed, that was causing the part of the lift that moves up and down to push against the rear of the housing with a TON of force. I jacked up the rear of the car and with a loud BAMM! the whole thing settled onto the safety stops again. Once the car was back on the ground i was able to re-position the jack points, grease the inside of the lift and test it again. WORKS! Was a very stressful couple of hours as the car could have slipped off and fallen 6 feet to the floor. (it was sitting pretty crooked until i could get it to dislodge)
I have completely planned out the fuel system, everything is mocked up now with the proper AN connectors and nice stainless steel braided hoses. I should have done more research on the costs associated with the aluminum tanks mixed with proper AN connectors. So far the fuel system alone has set me back about $5000, that's for rails, tanks, AN ends and fittings, filters, pump, regulator, gauges, hoses, chrome mounts, etc. However if a had to do it again i don't think i would change a thing..... except for the bad planning that left me with tons of extra hose and AN fittings.
I think the best part of this progress was how much floor space i gained in the garage. Its now easier to walk around the car and work.
I think this was the end of day one
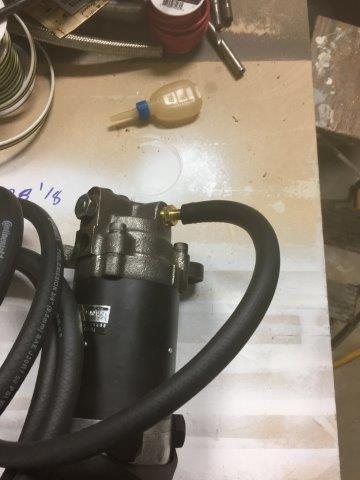
Fuel pump and filter location
This is how i mounted them, they are SOLID as a rock, the filters are bolted together and then held in place by the solid AN fittings. I was a little worried at first by putting the weight on them like this but you can use the filters as a handle and hang off this thing, its solid.
Regulator mounting location, i cut a piece of steel, it will be welded in soon. (I have since replaced some of these AN fittings to change the routing.
It was the first really nice day of the year so i brought out the RV batteries and went out to un-winterize the Winnebago.
This is the grease i used on the ball joints
This is the 3/4 thick rubber sheet... or at least part of it. I cut all the gas tank bases out of it (2 strips 2 layers each side)
More shots of the rubber, i used black silicone to stick the rubber to the metal and the top rubber piece to the bottom rubber piece.
tank set back in now sits perfectly level.
Some photos of the progress before the last day.
I will get some photos tomorrow of the exhaust installed.
Its funny how it really doesn't look much different then it did 8 days ago but it sure does have allot more effort into it.
found some time to go out today.
Today was problem solving day.
1) i welded new transmission mounts the other day however its impossible to get the bolt in because the support was in the way. I welded two new braces on and moved the support forward 3" on the passenger side. Repainted everything and put it back on the car again. Problem solved.
2) I had a stupid moment and put the eccentric bolts in and mounted all of the suspension before i put the aluminum foot boxes in. I had not noticed that i had the bolt in the wrong way around so it can never be removed. It just so happens that the pieces i bought from Shane have to be welded to the bolt that now cant be removed. So....... I had to drill out a fair amount of rivets, removed the bolt, and then put them all back.
3) the brake line supports prevented me from installing the floor aluminum, had to drill out those rivets, mount the floor aluminum then put it all back.
4) the clutch master cylinder leaks where the reservoir plastic meets the metal cylinder.... I have tried to fix this 5 times with no luck before today. So today i took it all apart, hit the plastic with a heat gun like the instructions originally asked for until the plastic was softer. I then remounted it and cranked the crap out of the bolt that holds it on. Refilled and bled the system again. I then put a piece of paper under it for a few hours...... no drips yet.
We live and we learn.... today wasn't a step backwards but it sure as hell didn't get me any ways forward.
I ordered these parts today from Chev
- Another Starter bolt (I need two of the factory longer ones for the new starter)
- Metal mount for EVAP canister
- Bolts for exhaust manifold
- Exhaust studs for mounting headers GM dealership, GM# 12561310.
- Bracket that holds the brake light switch (forgot to take this off the donor)
Still have to find.
- transmission fluid (the gear oil everyone recommends on the Porsche forum's isn't available in Canada)
so by my calculations this is whats left before i can drive it around the block.
- check that i mounted down all steering bolts.
- find bolts that will fit though the new trans mount.
- finish front aluminum,
- rivet radiator down again.
- attach the heater lines again
- Fill with coolant
- Find a way to finish the emergency brake. (I will have to order a longer brake cable, its good enough for now.)
- Mount aluminum pieces that go beside the fuel tanks.
- Mount fuel tank (not going to use a 2x4)
- Mount pump+filters
- plumb fuel lines
- Fill engine with oil.
- Fill Trans with oil. (have to buy it first)
- grease all zerks
- install new plug wires. (i have them in a box.... somewhere)
- Mount Starter, (new bolt is on order)
- Mount clutch peddle stop (read the forum post where this caused damage when it was missed)
- Mount ECU, (I already modified the bracket)
- Run wiring harness. (I bought a premade one, this should be quick)
- Mount the seat (sliding rails are $250 each side locally... i might have to hit a junk yard to see what i can find.)
- Exhaust (just the factory/GTM stuff for now, I have to buy the kooks)
- Aircond, finish plumbing, fill AC lines.
somewhat productive day.
I have everything between me and gokart in a checklist now, I made it though a small portion of that list today.
I had to remove the rad to get the drill to mount the grounding strap. (I should have mounted this earlier, whoops)
I mounted up the rear trans support cut the old brackets to fit the new transmission and tack welded them in place. This is where i ran into a problem that i am still scratching my head on how to fix. The bolts that need to go though the bracket and trans are now blocked by the square tube that runs down, I think my only option is to cut the square tube, weld in a smaller tube that fits inside and then drill a bolt hole though. This would allow the metal thats in the way to be removed, bolt put in, then reattached.
Gas tanks look great. I have been reading about how to mount these... i'm not a big fan of the 2x4 method, wood seems wrong somehow.
this is the clutch banjo and flexible line that i ended up with. Its all bled now.
I took apart the donor gas peddle, painted it black, mocked it up, drilled the holes, put in the rivnuts, now just waiting for the paint to dry before mounting one last time.
Getting back into it.
so i have been off traveling for work for the last month... back now and ready to get back into it.
lots of parts arrived while i was gone,
- the aluminum fuel tanks from Boyd
- the heater bypass kit
- the rest of the fuel system fittings
- the M12 banjo bolt for the clutch
Tonight i went to a local car show then came home and finished the clutch plumbing and bleeding. I was shocked to see a GTM at the show. It was in about the same state as mine, not quite running but almost there. It looked like a twin turbo LS7 setup, its all being built by a local shop, doesn't look like the owner is doing anything himself. I grabbed the shops card so i can try and get a hold of the owner later.
I worked for a month straight without weekends or evenings so i have a few weeks of time off saved up, the current plan is to take a week off next month to focus on finishing the gokart.
this is the GTM i saw at the Calgary car show.