I find myself still stumped with the AC wiring to the ECU.
i already have a fan override relay that will kick the fans on when i ground it out. What i need now is the PCM to disengage the compressors clutch above a certain RPM. I believe the PCM will also slightly increase idle while the AC is on. (not sure if that is true, i read it on a corvette forum)
I found the PCM pinouts for my factory C5 Corvette ECU.
As i mentioned (almost a year ago) in this thread these are the pins that i think i need.
C2 Pin 14 A/C Refrigerant Pressure Sensor Signal
C2 Pin 17 A/C Request Signal
C2 Pin 18 A/C Compressor clutch supply voltage
But it looks like these pins may also be involved.
C2 Pin 43 A/C Clutch relay control
C1 Pin 45 A/C 5 volt reference for Refrigerant Pressure Sensor
So here is what i am currently thinking.
- There has to be a way to program the PCM to ignore the pressure Sensor, I shouldn't need it as i believe that the Trinary switch does this already. This means i can ignore C1 45 and C2 14
- I believe the request to turn on the AC compressor should go to pin C2 17 (my guess is pulling this to 12 volts tells the PCM that we are requesting the compressor to turn on)
- I believe the C2 43 grounds out when all of the conditions are positive and the AC clutch should be engaged. I think this should be fed into a relay that drives the clutch on the compressor, or maybe its goes high to 12 volts when conditions are met?
- c2 Pin 18 could help drive that relay above but is not required, i could just pull IGN +12 instead.
Weekend GTM Work
I started off this weekend by mounting the passenger seat, I cut some triangle pieces of metal to give me something solid to bolt the seat to.
I welded the nut to the metal seat bracket so i can detach the seats easily without finding a way to get a wrench wedged under the seat
At this point i drained and pulled out the fuel tank and started to dry run the tunnel aluminum into place. This is where i rean into my first problem. With the aluminum in place the parking break wont move. It turned out that i had to remove the wire from the bottom of the boot so it would move easier, then bend the parking brake handle toward the passenger side.
gotta love clecos
painted the metal triangles that i had welded in.
I then riveted in the floor aluminum on both sides as it became evident that this piece has to be in before the tunnel aluminum.
I cut a piece of metal to fit in the factory fuse box location. I then tapped in holes to mount the fan relays, fan relays and engine harness relays. I then primed and painted the plate and the seat brackets.
I bought this on Aliexpress, it came today. It holds 8 relays and easily panel mounts. I will be using this for the lock/unlock, headlights, fog lights, hazard lights, etc.
I have had this tap and die set for years and finally got to use it. After welding on the nuts the bolts started to foul where the hit the metal brackets, Chased the threads and cut the last few and all was well.
my old makita grinder finally let out the magical smoke, so i went out and bought another one used for $60... was still in the box. Makita makes some solid tools, my last grinder was at least 20 years old.
Everything mocked up now (had to come off one more time for silicone. After this i removed all of the aluminum from the tunnel, made a wiring harness for the AC compressor complete with an ECU wire and put it all into split loom with heat shrink on the ends. I then attached both of the front mounted Vintage Air vent lines to the Vintage air unit. It was at this point that i noticed that the vintage air electrical unit on top was mounted so tight to the aluminum panel that the connectors would not fit.
Here you can see how i moved the Vintage Air electrical box. It was a pain in the *** to move as the screws were not not accessable. This one is on me, i should have noticed when i was mounting the foot box aluminum that i was blocking both the electrical connections and the mounting screws. I used a pair of needle nose channel locks to spin the screws out slowly from the top then bent the ends of the bracket out so i could mount it on the vertical aluminum on the passenger footwell. I also mounted a piece of rubber to the bottom of the control unit so it mounted tightly without it being able to vibrate when the car moves.
Time to hit the other side, i removed the driver seat, floor, gas tank, etc. I also had to move some wiring harnesses that i stupidly put though the frame where the aluminum needed to mount.
Before closing up the tunnel i drilled in 4 rivnuts and mounted the coolant lines as secure as possible.
This is where i stopped taking photos but i did get some more stuff completed.
- I mounted the small piece of aluminum to the passenger side foot well at the top and sealed all the holes
- mounted all of the tunnel aluminum with sealant and rivets
- Riveted on the AC compressor cover.
- Mounted the front aluminum piece that mounts beside the master cylinders
So here is my updated list
- Mount the ODB2 connector by the steering wheel (to the square tubing between the console and the column
- My engine harness has a fuse block of 5 fuses... needs a place to live under the dash.
- move the fuel pump filter to make room for the dual FF cold air intake.
- finish off the wiring and test it all out
- Weld nuts to the drivers seat brackets + paint black (so i don't need two wrenches to remove the seats)
- finish the tunnel aluminum
- finish bolting AC accumulator together (pressure test it)
- Add the drain line to the AC unit and route it out the bottom
- Wrap the headers
- cut the holes in the top aluminum for the AC vent ducts
- put safety wire on the rear axle bolts again (removed a while ago to fix something)
- Mount the horn
- make a bracket to support the Kooks exhaust
- install the fuel tank vents + roll over valves
- Install the fuel pump controller
And here are the 4 items i finished after my 18 hours in the garage.
- mount the passenger seat (driver side required some welding, i will do the same to the other side)
- rivet in the front piece of aluminum above the AC unit.
- Add the small piece of aluminum in the top of the passenger foot well
- make a metal plate to fill the factory fuse panel hole in the back. Then mount the fan fuses and relays to it
as i type this my fingers can barely move, drilling holes and putting in a few hundred rivets is really hard on the hands.
but i loved every minute of it.
On-Again
started working on the car again... i have an on-again off-again relationship with the car..... i am back to on-again.
Wiring harness is now in, extra wires have been removed, I had to add a few new wires
- Wiper fluid spray pump, not sure why this is missing from the painless harness, it has wires for the motor power, but not the sprayer
- Door plungers (for dome light)
- 2nd switched dome light wire
- in the door i added a ground wire (not sure how good the ground would be as the door is not metal
- electric mirror wires.
- lock motor +
- lock motor - (these are after the relays under the dash)
- Power window wires, current wiring assumes the switches are in the door but i will put them in the center console as thats what the manual calls for.
- electric column motor (for sliding it in and out)
- ECU AC signal
- side markers (the law where i live)
- Fog lights
I was surprised the so much was missing from the harness. Also i found it frustrating that the harness is clearly made for a front engine car. Also the documentation for wiring the vintage air unit was somewhat lacking. A quick google search turned up some good videos and a wiring diagram for trinary switches.
But if it wasn't hard it wouldn't be worth doing. 🙂
I had to buy a few parts
- Speedos were on sale at speed hut so i picked up a KPH unit, should be here in a few weeks.
- I bought loom that was not split loom, i ended up getting rid of that and buying painless split loom, its much easier to use.
- 12 gauge and 18 gauge wire in a variety of colors.
- a vacuum coolant filling system, sucked the bubble right out of the coolant system.
- I picked up an 8 relay holder that will bolt up under the dash to run the locks/highbeams/lowbeams/park lights/fog lights/vintage air/hazard lights. I found it weird that the kit only comes with 2 relays.
I now have to test all of my wiring and complete a short 12 item list of picky little items before mounting the body on. Then its on to figuring out doors!
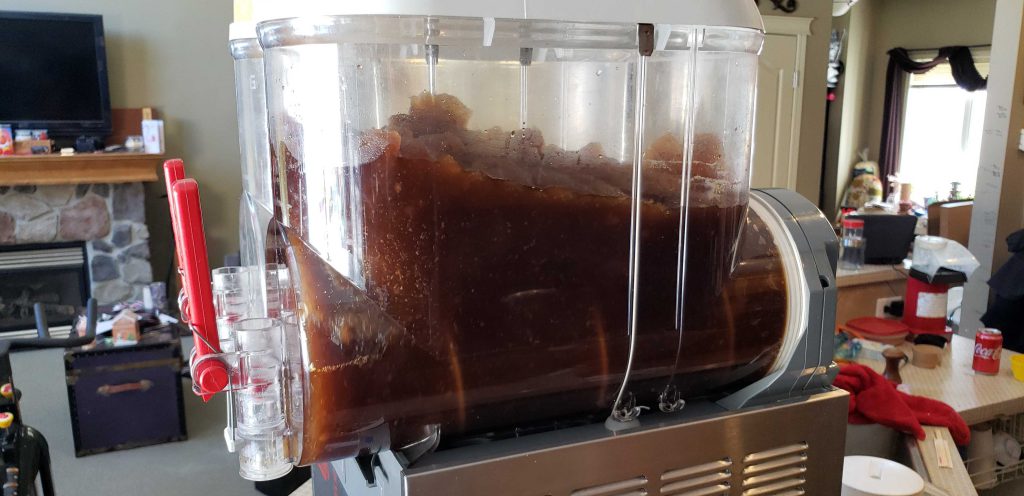
Taunting Diabetes
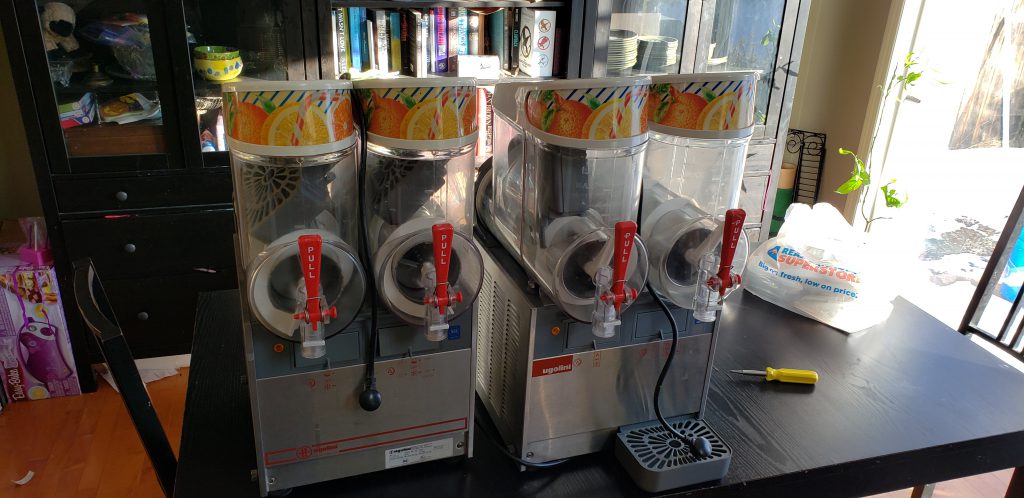
Searching Kijiji like I normally do on the train ride home from work I found a small convenience store selling off their Slurpee machines.
First we experimented with 10 liters of coke which works quite well, adding a cup of water makes it work even better.
But Koolaid seems to work the best.
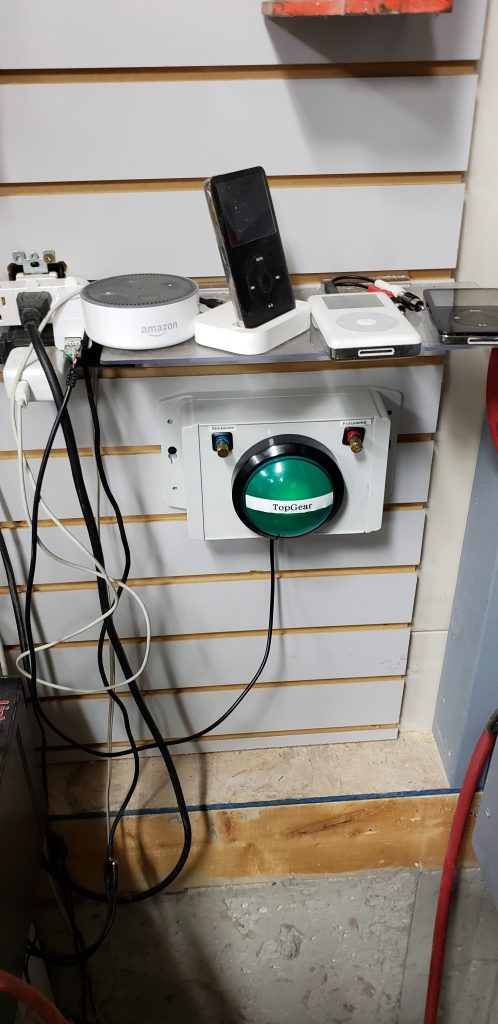
Garage Entertainment
The garage has had a TV for a while now but finding something to watch in the garage takes away from valuable project time. I now have a Top Gear button. Pressing on the big green button will send an MQTT message that my server will then parse, select a random episode of Top Gear, turn the TV on if its not already on, switch it to the kodi input and start playing that random episode. There are also smaller buttons for the Simpsons and Futurama episodes.
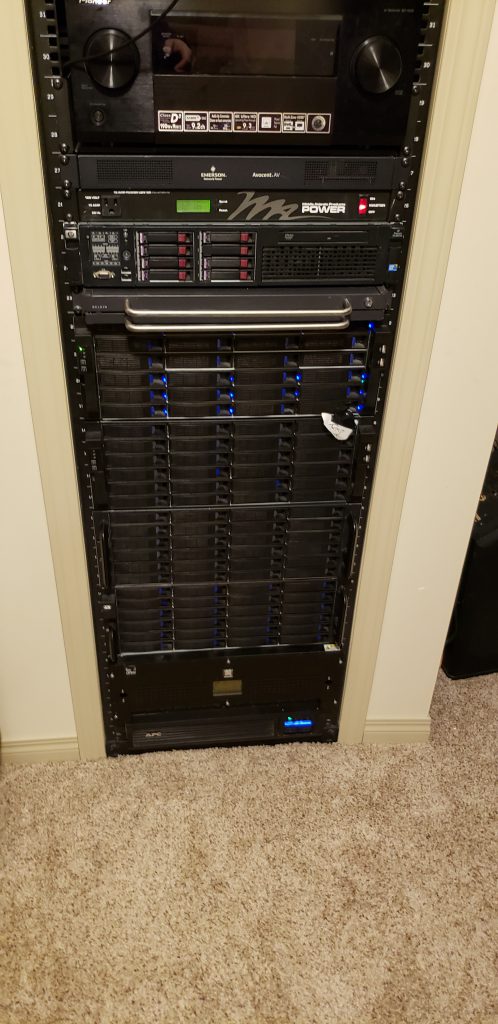
MORE STORAGE!
Van Rust
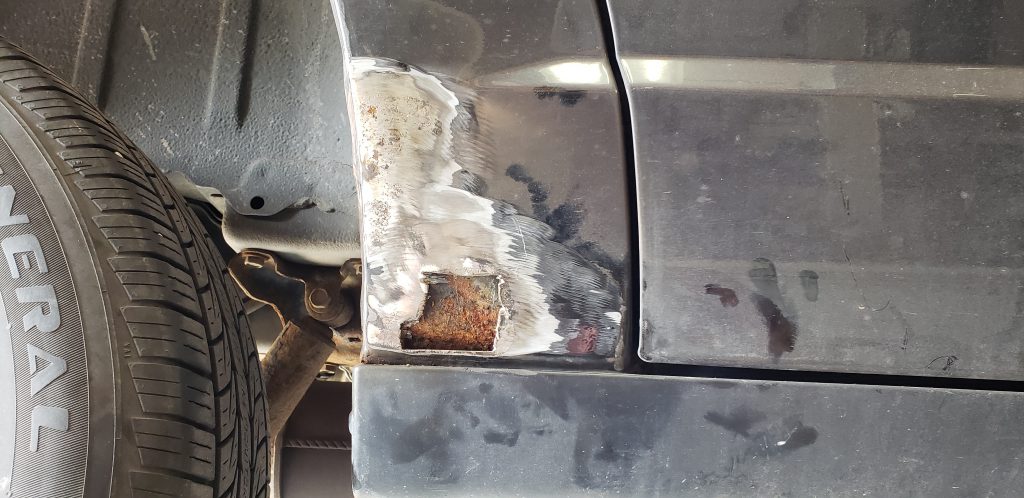
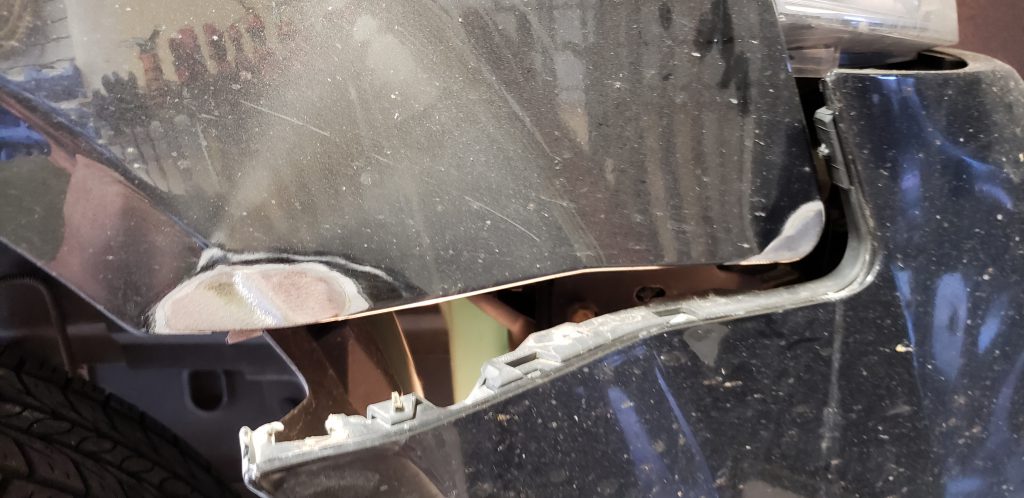
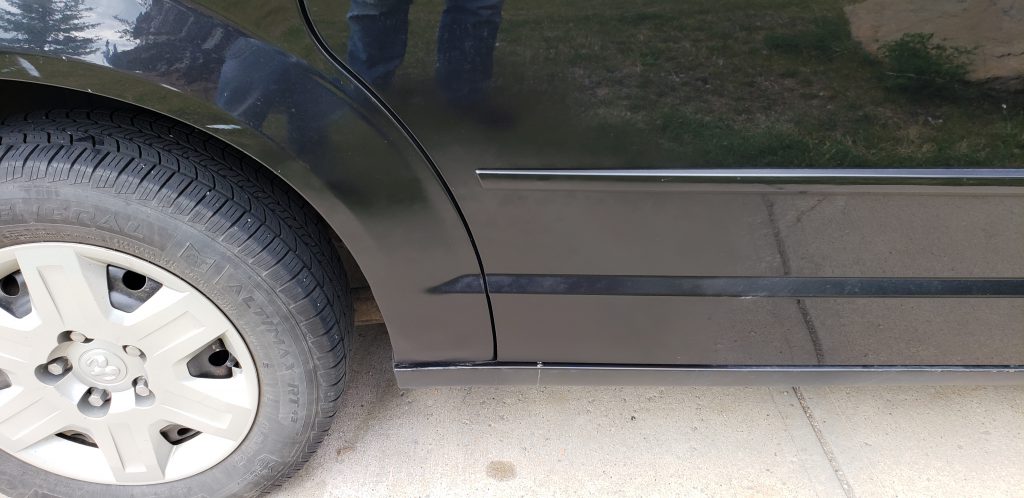
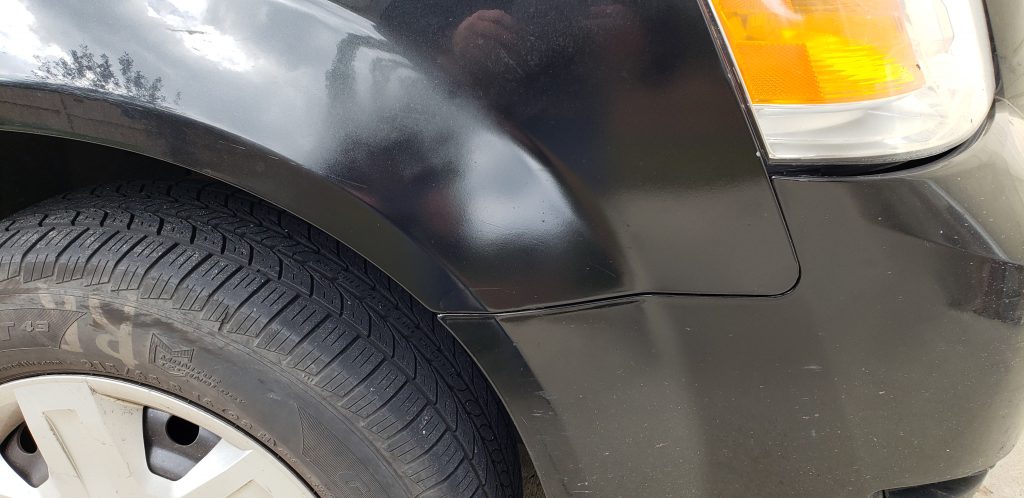
My Minivan was starting to rust, I have never done body work before but that's not going to stop me from trying!
I started off thinking that all i would need to do was sand off some surface rust, wipe the panel down, prime and paint. When i started to sand the rust spot started to get larger and larger. The panel was rusting from the back side forward. So i pulled out the trusty grinder with a cutoff blade and started cutting out the rust. I then welded in a new piece of metal bent to the same slope of the panel. Applied a thin layer of bondo, sanded it all smooth, and primed, painted and clearcoated. End result was pretty good.
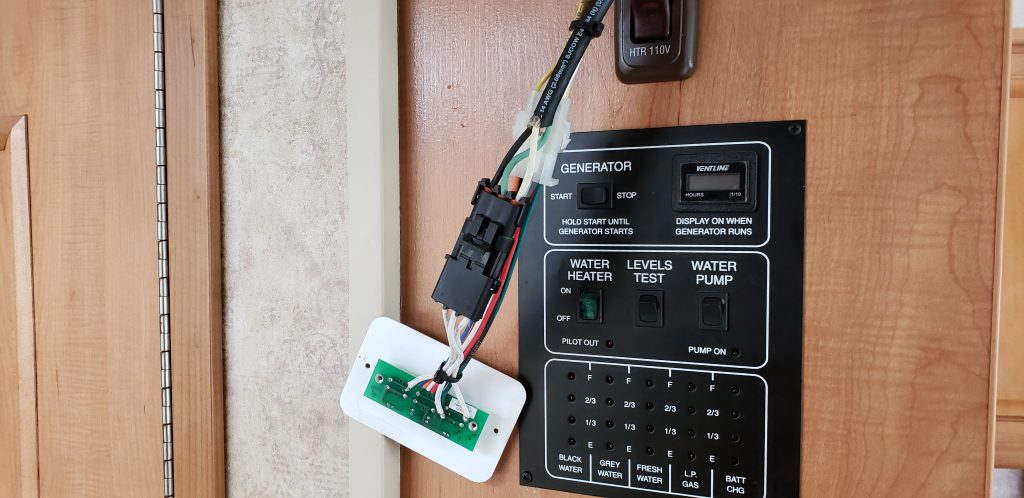
RV Setup Remote
We started camping with tents... allot up up front packing and setup work is required before you can open up your first beverage and sit by the fire.
We then moved up to a 5th wheel. This allowed for quicker setup and packing time by allowing us to keep items packed all the time, just hookup and go. But there were still manual jacks that needed to be hooked up, a furnace that had to be lit, a water heater that had to be lit, etc.
Then came the RV, auto leveling jacks, self starting appliances, slides that open up at the touch of a button... but it was still missing something. I couldnt operate the entire setup while at the campfile while sitting in my chair, enjoying my tasty beverage.....
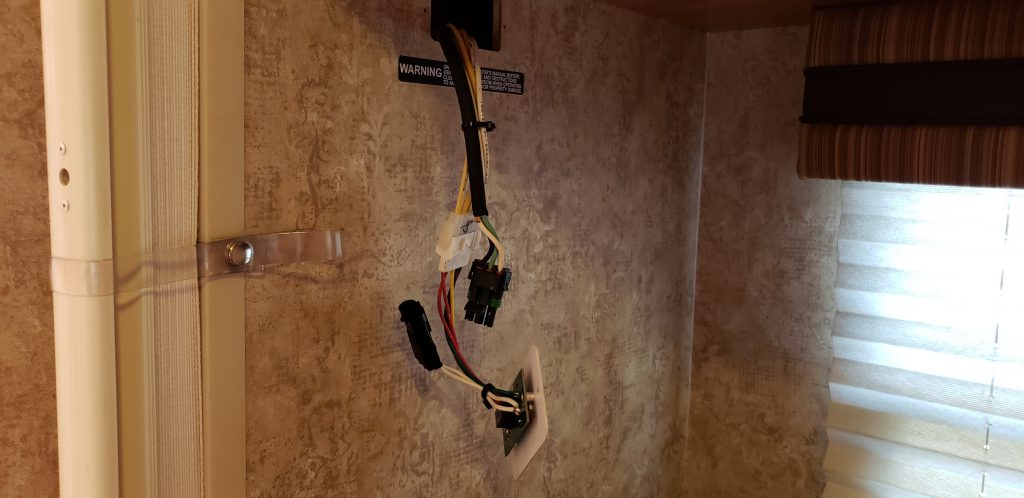
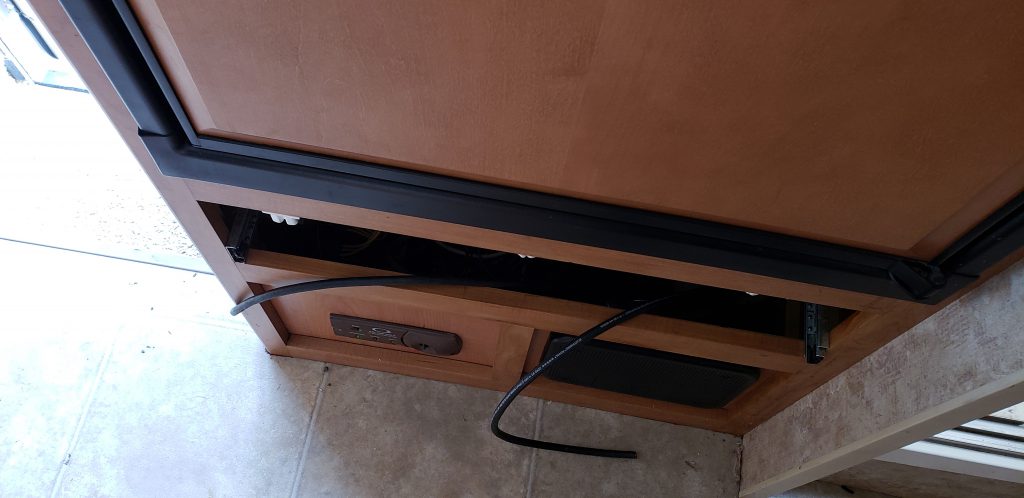
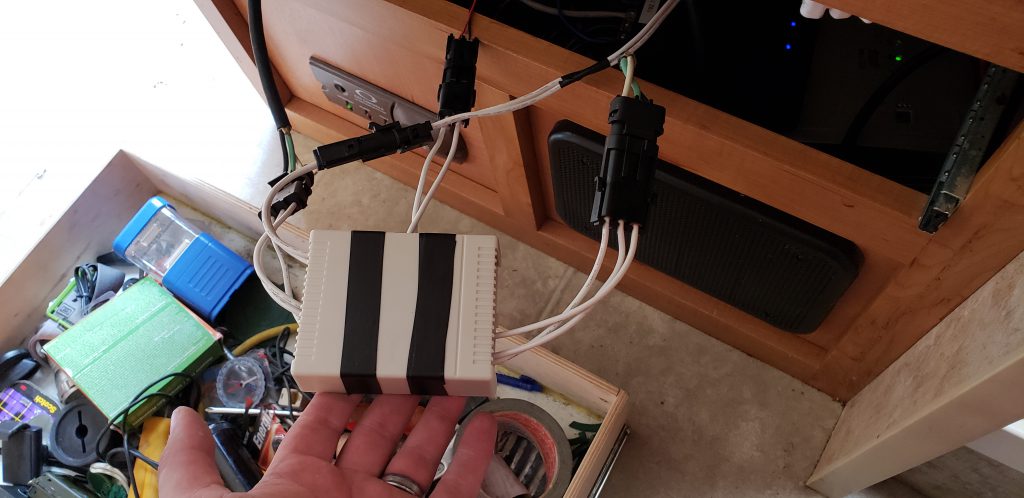
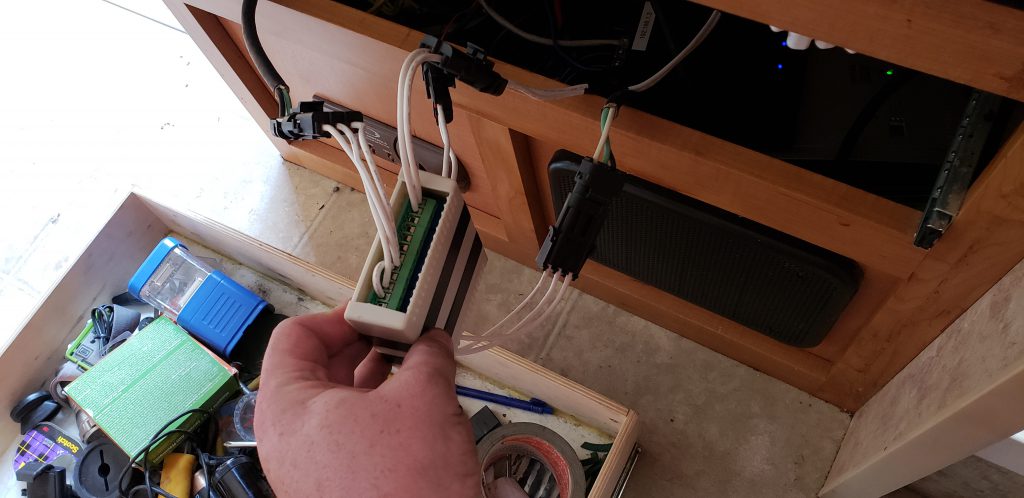
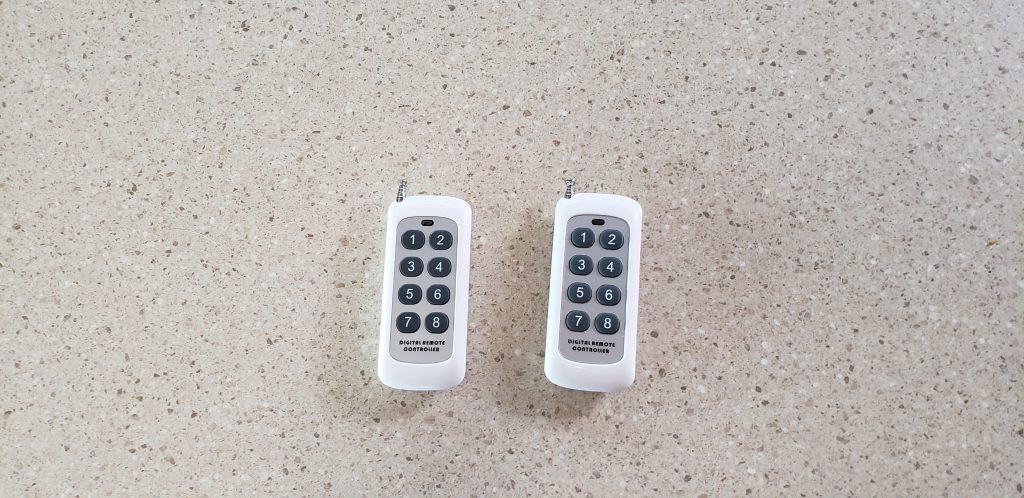
Where there is a will, there is a way. I have now added a wireless remote the to RV's jacks and slides. I simply pull into the campground, get out of the RV, Grab my chair and sit down around the fire pit.
- Button 1) Lowers the jacks and levels the RV
- Button 3) Opens the first slide
- Button 5) opens the second slide
- Button 7) will open the awning when i get an electric awning.
Then to pack it all up
- Button 8) will close the awning when i get an electric awning.
- Button 6) Closes the second slide
- Button 4) Closes the first slide
- Button 2) raises the jacks
Pure bliss!
More GTM progress,
For the replacement KPH gauges i think i am going to pick this one up.
https://www.speedhut.com/gauge/GRM4-...and-high-beam) ( i am undecided if i want one that goes to 400KPH, less practical but does have a bit of wow factor.) They also have this one that tops out at at 300KPH which would mean i would be able to use more of the gauge during normal driving. I also like that these have built in signal indicators and high beams indicator. Makes things easier to wire up.
I now have proper crimping tools so i can make secure water tight connections. I have also ordered 10 weatherpack connector sets in each size (1, 2, 4, 6 pins). I will use them for wiring the AC, Audio system, gauge cluster, wiper, signal lights, etc.
I had to take the rear transmission support off to weld in the wing mounts, i jacked up the trans, pulled the bolts then slowly lowered it onto a socket to keep the weight off the axles. Worked like a charm.
I found this great video for wiring the Trinary switch. https://www.vintageair.com/tech-vide...rinary-switch/ Seems easy enough.
Wing mounts are now welded on along with the braces that come with the kit. They look a little uneven in this photo but they are exactly equal on both sides. I ground the welds down with a flap wheel on the top before painting so it all looks like one piece of steel. I then painted the whole assembly gloss black so everything matches and nothing rusts. I also took the time to paint the AC Accumulator bracket, i found that it was easiest to mount the bracket by bending over the mounting piece and screwing it into the top of the square tube.
Before i put the rear mount back on i am going to use this convenient access to the rear end to finish securing all the e-brake cables and shifter cables so they stay clear of the exhaust. I may even pull the trans one last time to double check the clutch install.
For some reason all my other vehicles decided to cry for attention, this stack of parts will take me away from the GTM for a few days. My minivan has a stuck rear caliper, and it has a leaking heater core, my 4x4 GMC broke 2 door handles and needs front U-joints. Parts are starting to roll in for those projects as well.
More GTM Progress
I figured i would post to say that i'm not dead.
- I have ordered the rear wing supports from vspeed, i need these before i can throw the body on.
- I have ordered the trans reverse switch plug from vspeed, i need that to complete the wiring.
- I have ordered the rear hatch hinges from vspeed, body mounting is coming up fast, this will be important soon.
- I have ordered the Aeromotive fuel pump controller from Summit, the pump runs flat out all the time, its loud, this should increase it's life... and my the life of my hearing.
- I have ordered 2 tank vent roll over valves from Summit, this will help me not die by fire in a rollover.
While i am waiting for parts i am trying to complete the last of the items between me and go-kart.
I have the telescoping steering kit but the brake light bracket that i got with the kit was the shorter one for the non telescoping kit.... So i decided to take the new welder for a test drive and make the bracket bigger to accommodate the pillow block bearing. Finished and looks good, paint is drying now (I will get some photos up soon)
FF sent me a set of gauges with the car that are in MPH not KPH... i guess that's just what they do for some annoying reason even though they sell this car globally, I contacted the manufacturer to see if the gauge could be changed over to KPH and it cant. So i asked if they had a matching gauge i could just buy, they don't.... so if i want matching gauges it looks like i need to buy a complete new set. I have also read that you can calibrate the MPH gauge to KM, however i'm not sure how the inspector is going to like that when i go to plate the car.
Other then that i have been drawing tons of wiring diagrams on paper for the cabin/ac/lights/av,etc Once i have all the wires in place (and maybe a few spares) i will start closing up the tunnel.